 +86-13121914007

 English


How to Fit a Vertical Radiator
Now the temperature has dropped a lot, and the temperature difference between morning and evening is also great. You should still keep warm, especially if you don’t have a anthracite designer radiator installed in your home, you should install it as soon as possible. After all, it’s really pretty autumn now. Short, winter is here in a blink of an eye.
When it comes to installing vertical radiator, exposed vertical radiators are the most common way for everyone, whether you are in an old house or a new house that has been renovated.
1. The first-phase heating project construction is carried out after the wall renovation, before or after the construction of water and electricity and must be carried out before the construction of other decoration procedures. Before the first phase of the heating project is completed and is accepted and signed by the owner, no other decoration procedures are allowed to be constructed.
3. During the first phase of construction, the pipeline must be fixed and sealed according to the number of radiators, the width of each vertical radiator, the indirect distance of the vertical radiator, the method of water inlet and outlet, and the center distance of the interface set by the owner. The dimensions must be accurate, otherwise it will affect the later stage. Radiator installation. At the end of the first phase of the project, the construction personnel can seal the groove after the owner has passed the site inspection and acceptance, and the first phase of the project ends. After the completion of the first phase of the heating project, the decoration workers must take care of the heating pipes and facilities during the decoration process, and must not move or damage them.
According to the relevant national regulations, the heating system pressure test should be carried out according to the following steps:
(1) Block the end of the test pipeline, slowly inject water, and discharge the gas in the pipeline at the same time;
(2) After being filled with water, perform a water tightness inspection;
(3) It is advisable to use a manual pump to slowly increase the pressure, and the pressure increase time shall not be less than 10min;
(4) After rising to the specified test pressure (the working pressure is 1.5 times, not less than 1.0Mpa, if the working pressure of the radiator system is large, the test pressure should be increased accordingly), stop the pressurization, stabilize the pressure for 1h, and the pressure drop It shall not exceed 0.06Mpa. Within 30 minutes, two pressure supplements are allowed to rise to the specified test pressure.
(5) Then under the condition of 1.15 times the working pressure (the working pressure is generally not greater than 0.6Mpa, that is, the test pressure is 0.8Mpa to meet the requirements), the voltage is stabilized for 2h, and the pressure drop shall not exceed 0.03Mpa. At the same time, check that each connection is qualified.
horizontal designer radiators uk installation diagram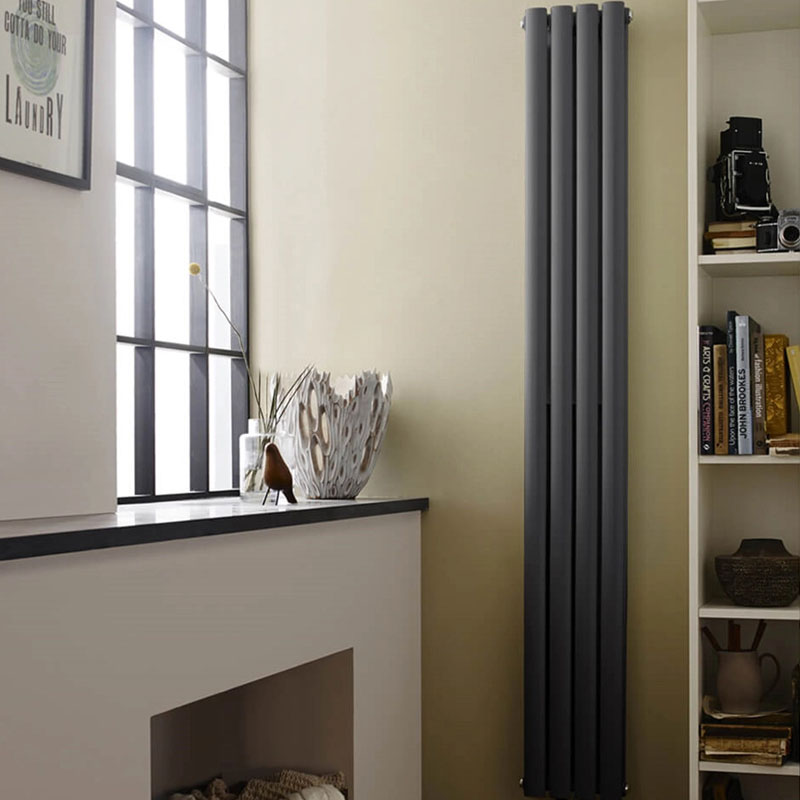
4. Construction of the second phase of radiator installation. After the customer's home decoration work is carried out until the walls have been painted or the wallpaper is pasted, the second phase of construction and the installation of the Uk radiator can be carried out after the installation is completed and the suppression test is qualified. The installation of the wooden floor can be carried out.
According to relevant national regulations, the pressure testing procedures for the second phase of the project are as follows:
(1) Before pressurizing designer double radiators, flush the entire system to ensure that there are no impurities in the system;
(2) When ensuring that the end of the pipe is blocked, and the plug of the radiator and the exhaust valve are tightened, the system is slowly filled with water, and the exhaust valve of the radiator and the exhaust valve of the manifold are used at the same time. Exhaust the gas from the entire system;
(3) It is advisable to use a manual pump to slowly increase the pressure, and the pressure increase time shall not be less than 10min;
(4) After rising to the specified test pressure (refer to 0.8Mpa) (1.5 times the working pressure, but not less than 0.6Mpa), stop the pressurization, stabilize the pressure for 2h, and the pressure drop shall not exceed 0.05Mpa. At the same time, check that there is no Leakage is qualified.
Categories
Recent Posts
For inquiries about our products or pricelist, please leave to us and we will be in touch within 24 hours.


 Headoffice: 1202 Asia Pacific Tower,Nanjing Road,Hexi Ditrict,Tianjin City,China
 Factory: Haibei Town,Ninghe Ditrict,Tianjin City,China 300599
 +86 13121914007
 info@slradiators.com

Copyright! 2021 Sunlike. All Rights Reserved. Powered by Vivian

IPv6 network supported Google Anylitics Console
